
Have you forgotten how to write a check?
Unfortunately, there are just certain times when you don’t have many other options other than writing a check.
Sometimes you’re out of cash. Other times the store won’t accept credit cards.
That’s why it’s important to know how to fill out a check.
However, to keep things in perspective, I think I could count the number of checks I’ll have to fill out this year on one hand.
I definitely won’t use up the whole book of checks I have.
Here’s a quick list of steps to write a check with cents followed by a detailed step by step example check. Click on any step to jump to it below or read on to get the full details.
At the end of this detailed step-by-step, we have compiled a quick printable guide you can have, as well.
- Enter the date on the top right
- Enter the payee on “Pay to the Order of line”
- Write check amount in numbers in the $ box
- Write check amount in words on the line that ends with “Dollars”
- Write necessary information in “For” or “Memo” field on the bottom left corner
- Sign check in the bottom right corner
So How Do You Write a Check Anyway?
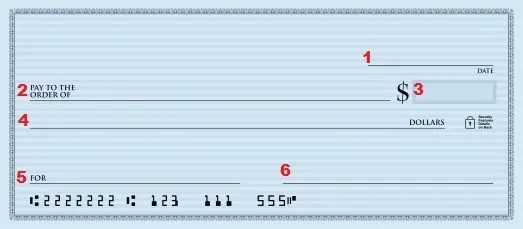
There are six fields you will need to fill out and I have numbered them in the image below. Follow the instructions that follow each image to learn how to write a check with cents.
Related: Routing Numbers: 3 Ways To Find Your Number Fast
Step 1: Enter the date on the top right
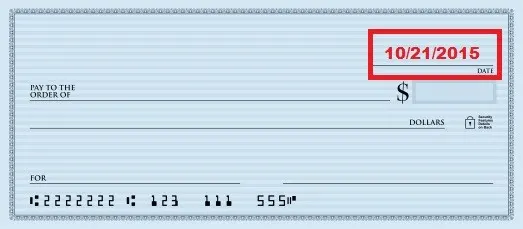
Insert the date in this field. You can write it out pretty much however you want but you must include the month, date and year. Here are some examples of acceptable formats. October 21st, 2015, Oct 21, 2015, 10/21/2015, 10/21/15.
Step 2: Enter the payee on “Pay to the Order of line”
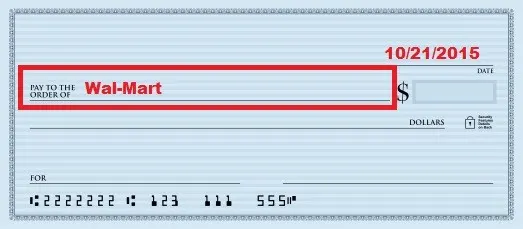
In this field, you will write the name of the company or person you’re writing the check to. Make sure to use the proper name so the person or business you’re writing the check to can deposit or cash it.
If you are writing a check to a person, write their first and last name. If you are writing it out to a business, write out whatever the business has asked you to fill in.
Step 3: Write the check amount in numbers in the $ box
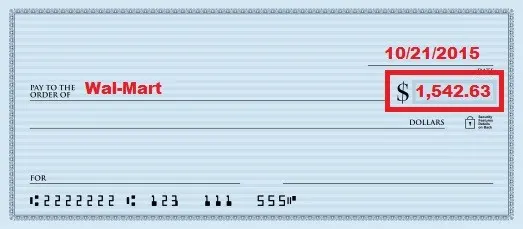
Here you write out the amount of the check in numbers. For instance, you’d write “1,542.63” without the quotes for a one thousand five hundred forty two dollar and sixty three cent check.
If you want to write a check with no cents or zero cents, simply put .00 after the dollar amount in this box.
Since the dollar sign is already printed on the check you do not have to write another $. Make sure that you put a decimal place in the proper spot. If the check is over 3 digits you can use commas as well.
Step 4: Write the check amount in words on the line that ends with “Dollars”
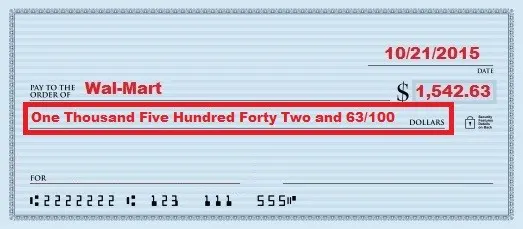
Here you write out the amount of the check in words. In our example above you would write one thousand five hundred forty two and 63/100. Write out the dollar amount in words and then use a fraction to represent cents.
As a quick tip, I write a line through the rest of the empty space so people can’t easily add more words to the end to make the check worth more.
If you want to write a check with no cents or zero cents, simply put 00/100 or xx/100 in the place you’d usually put the cents.
This field should be used to determine the value of the check if there is a discrepancy between the numbers amount and the words amount.
Step 5: Write the necessary information in “For” or “Memo” field on the bottom left corner
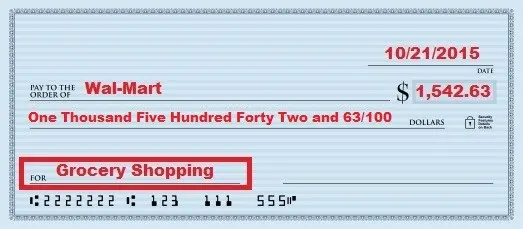
In the for or memo field, you can write whatever you want to help you remember what the check was for if the person or company you are paying doesn’t require something different.
Some businesses like you to write your account number or an invoice number in the memo field so they can keep track of what you are paying for.
Most banks return scanned images of your checks with your bank statements or at least offer you some way to view an image of a check so this might help you remember what it was for.
Step 6: Sign check in the bottom right corner
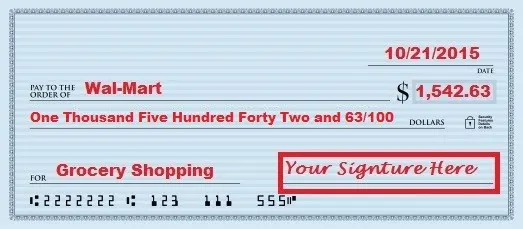
This is where you sign the check. The check isn’t valid until you sign it so make sure you don’t forget this crucial part. Never sign a check until all other fields are filled in.
If you do sign a blank check and someone finds it they can write out a check to themselves for the whole balance of your bank account.
Now You Know How to Write a Check With Cents
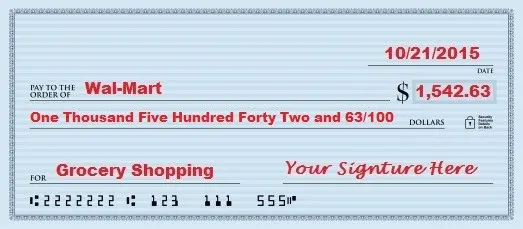
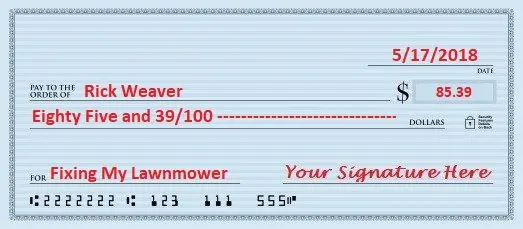
Here is a final version of what your completed check should look like after you have filled it out. Make sure you use the facts applicable to your situation though, not the example. I don’t think I’d want to pay Wal-Mart for $1,542.63 of groceries.
Related: Walmart Grocery Pickup Review and $10 Off $50 Purchase Promo Code
Writing a check seems like a pain with the options you have for paying your bills today. Instead of writing checks, I personally use things like online bill pay from the company that bills me or I pay directly from my bank’s website.
Learn all six steps of how to write a personal check.How To Write A Check
Materials
Instructions

Did you know how to write a check with cents before reading this? If you think someone you know could get help from this post please pass it along to a friend or bookmark it for future use.

Lance Cothern, CPA holds a CPA license in Indiana. He’s a personal finance, debt and credit expert that writes professionally for top-tier publications including U.S. News & World Report, Forbes, Investopedia, Credit Karma, Business Insider and more.
Additionally, his expertise has been featured on Yahoo, MSN, USA Today, Reader’s Digest, The Huffington Post, Fast Company, Kiplinger, Reuters, CNBC and more.
Lance is the founder of Money Manifesto. He started writing about money and helping people solve their financial problems in 2012. You can read more about him and find links to his other work and media mentions here.


Ed Budnick
Sunday 25th of March 2018
Yes I just seeking help for myself in writing out a check for the very first time!
Lance Cothern
Thursday 29th of March 2018
Glad we could help!
Michael S.
Tuesday 18th of August 2015
I've always had a question about what to do if you ever run out of space in the legal line when spelling out the number. Haven't had to write a check for an amount that large yet but I've asked even people at the bank and no one so far had been able to tell me yet. I was reading the comments on debit cards. I'm a self employed professional and I have yet to sign up with a card processor and hope I don't have to. People like me don't want to be paid in credit cards specially when we don't handle that much money because it costs us a fee. In fact my tip to a lot of my friends is to use cash wherever dealing with small business. Ask them first of course. But you'll get much better treatment.
Lance Cothern
Tuesday 18th of August 2015
Michael - I don't have a legal answer for you, but what I would do is either try to write a bit smaller or pretend the line has two lines and smush my writing so it is smaller vertically.
Can't say I blame you for preferring cash or check as a small business owner. However, accepting credit cards and raising prices by the amount may open you up to find more customers. However, if your clients don't mind, cash is clearly the way to go from a cost standpoint.
Trisha
Tuesday 7th of October 2014
Is it better to write $ 1,500 as Fifteen Hundred and No/100's instead of One Thousand Five Hundred and No/100's?
Lance Cothern
Tuesday 7th of October 2014
Trisha, it doesn't matter. Both mean the same thing and would both be acceptable. I have done it both ways depending on which mood I'm in. One Thousand Five Hundred would take up more of the line which would leave less chance to fraud, though.
Financial Checklist: 25 Things to Take Care of Before You Turn 25
Thursday 13th of March 2014
[…] Learn how to write a check […]
Amy
Saturday 7th of December 2013
I wish I could figure out a way to not have 30 grand in student loans take over my life while I have a child to take care of on one income. I was always told the best thing for me to do was go to college as a single mother!! NOPE i'll be spending half my monthly income on debit I needed while I was in school. And we will never leave KANSAS!! LOL Your so lucky!!! Thanks for this site, I used it to help a foreign student understand how to write checks. She was very pleased! Amy D.
Lance Cothern
Saturday 7th of December 2013
Glad I could help with the foreign student! As far as your student loans go, that stinks that you're in that situation. Just try to keep your head up and pay extra on those loans whenever possible so they'll disappear as fast as they can. Once they're gone, hopefully you'll be free again!